The attic is a place dedicate to share my passion :costuming and sewing.I'm not a professional or expert seamstress,only the mother of young kids who love sewing.You won't find 100% historical costume,museum replica, perfection or extreme thing here.

I believe everyone who bring some goodwill can sew and enjoy it.The attic is an unpretentious place .I show my work, information and hope it could somehow inspired you.Feel free to leave comment or share idea.Be welcome and visit as much as you want.


Affichage des articles dont le libellé est renaissance challenge. Afficher tous les articles

samedi 13 juin 2015

Underdress and final dress : to be complete in the futur

 Sketch of the pieces for the lower part of both final gown and under dress.

One of my greatest fear during the process of this project is about the shape of the dress.Even if I have done a lot of research I'm always scared to not have the perfect , historically correct cut of my piece to achieve a right look.Even if I have a pattern form Reconstructing history , I did change it to fit what I want.

What I found the most usefull is the web site of Katerina the purple files on Florence dressing and the link to the colluquium about the dress of Eleonora of Toledo.If I had seen this before , I think I didn't buy the pattern of RH.There is no need.
Mock up in progress

 As you can see , the lower part of the dress have big pieces .My table was not enough and I found the floor more usefull then ever.Hopefully my son was at the daycare at the moment I did that , otherwise it wouldn't be possible.

I plan to have a longer back for the final dress and more straight for the under dress.The lacing will be on the side not on the back.I haven't choose if I will have a more round or a v shape for the upper part.
The fabric : silk damask and silk taffeta from renaissance fabric .I did fall in love with the silk damask but can't say the same about the other.

I know many costumer love with a big L silk taffeta because it's not too shiny and the crisp feel.My problem is about washing it.It is suppose to be dry clean.I wasn't able to find dry clean kit to do it at home and I really don't see myself to give my fabric to a cleaning service .It's not a cheap fabric and I will trust no one else then me .

I did wash it with water , it was a little dirty .The color wasn't the same.When I receive the fabric I thought there was a mistake because it looks like grey.Washing it was a necessity but the wrinkles.I did gently iron with steam but it's not enough to make it 100% perfect and I want it to be perfect.I seriously plan to buy a steam machine or to buy another piece of the fabric.
I thought I could make a second pair of sleeve lined with fur.I got this false fur for a good price .The color is more cream - yellowish then the picture shows.
To help the skirt of the dress to hold better his shape , a lining at the hem.This is a period correct method to use.I will try the 2 following : on the top dutch linen tape , bottom twill tape.The size is almost the same and each will be used on a different part of dress.Both tape have been buy from William Booth draper.
Two sleeves mean they will could be remove and need to be somehow attach.I will made handmade eyelet .I found a purple silk ribbon and metallic point for the end of the ribbon.The color of the ribbon is not exactly what I want but until I found better it will be this one.The point are from Historical enterprises , ribbon from Sartor.

Right now not much of the fabric is cut.Many adjustment have to be done .The totality of this project is on the hold for the moment.I have many other little things to do before jumping back in this project but I hope to be able to do it somewhere in the autumn.

This was the last post about all I have done so far for this project and what have been done during the costuming challenge.If there is anything you would like to have more detail about it , let me know.I can write more on it.

vendredi 12 juin 2015

Usefull books and adress

I thought I could share all the  web adress I used during the IRCC 4  .Some are really nice and I would like to share them as it could help other.The first link is a pretty good one and can give you an idea of what you can achive.

For the book , well depending on the project ,  you may use some of them or not but I let you be the judge of that.Anyway I mention most of them in the post .If some of you are really interest to know which one I use ,  email me so we can discuss of it.

So here are the link on the web:

Katerina purple files
Archivio Medicis
Colloquium from the Katerina purple files
The renaissance tailor
The realm of Venus
Elizabethan costume page
Scala museum
Web gallery of art

jeudi 11 juin 2015

Layer no 3 : soft stay

Soft stay from Eleonora Di Toledo .One of the rare piece of her wardrobe which has survive.It was part of her funeral outfit.This picture can be see in the book Moda a Firenze.


Except for the outfit she wore in her tomb , mostly nothing survive of the wardrobe of Eleonora Di Toledo .All her clothing was given after her death.Except for a complete metallic corset , she have only soft stay with no bone or something rigid in it.

I thought using the only image I had in the book Moda a Firenze , I could  recreate a soft stay  .It was a risk for 2 reasons : I never done a corset or stay before and the shape of my piece could not be good or historically correct.

After looking carefully at the picture , I decided to make three pieces and used hook and eyes to close the front like the original.

To make sure it fit me perfectly , I did many attempt.I even ask my friend Gwenyver to help me for adjustment.After 4 failures , I thought next time it work or I give up.I redraft my pattern , reajust it and it work.A success entirely mine.For someone who never did patterning before I'm pround of it.


Front view .Note to myself : next time lined it in a similar color.
Side view , already starting to have a belly.
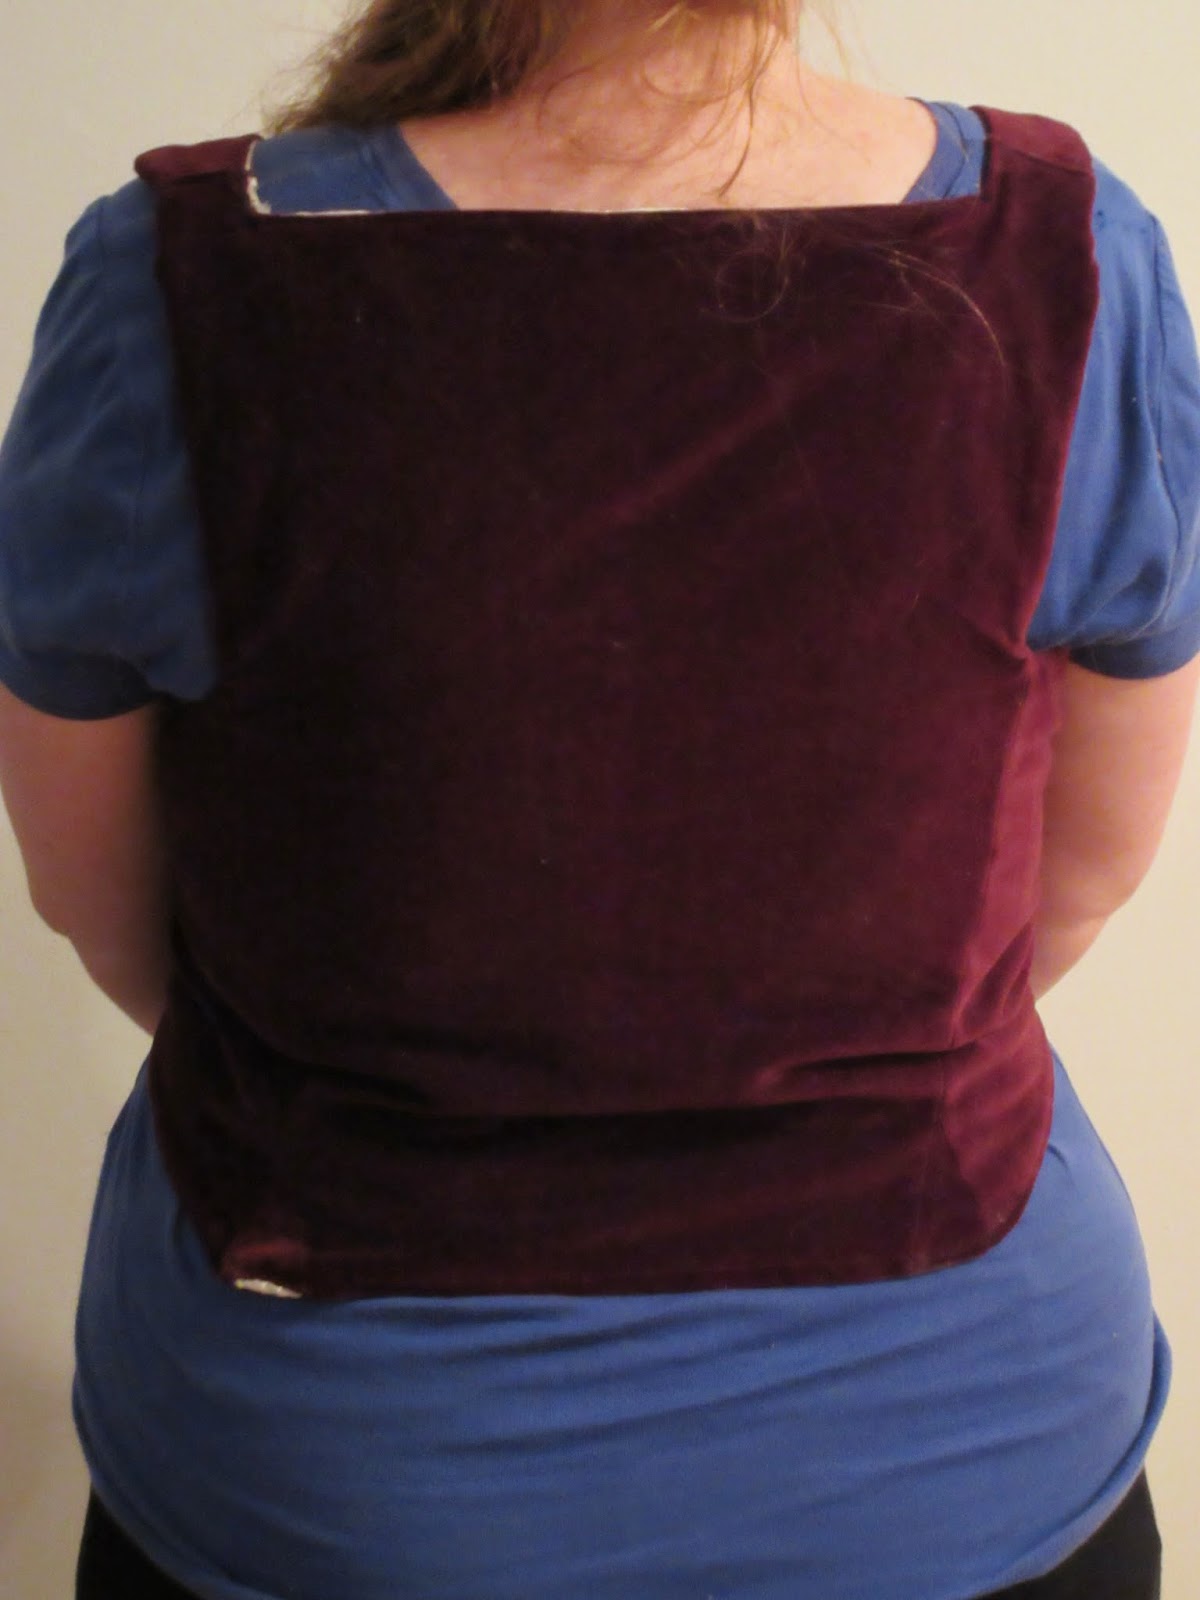
Back view

Even if I did a mock up , it seem at the end it was a size bigger and so perfect .I was already pregnant at that time and my body had start changing.Somehow the adjustment will have to be done again because it doesn't look perfect at all for me.
A few mistakes have been done during the process.No glory but we learn from our mistakes right.

First :doing pad stitches to keep all the layer together and move with fluidity.It does take time , too much time.The pink cotton velvet is not a great quality and even if I iron it gently , the stitches pad shows .It mark the velvet , not cute.

Second: using another color for the lining.I did used leftover linen I had ,ivory and black .A total of three layers to make things not too thin.I should used a similar color of the velvet .When it's close it show a little of the lining , easier to hide when it's the same color.

Third: as the last picture show , when I did the pad stitches their is a panel I did wrongly.For a question of time I didn't have the time to do another.So has you can see it , I had to used it on the wrong side which mean the inside of the stay is 2 colors.As a good excuse , I did a part of the stitches when my son was at the hospital for a surgery.I was nervous.

A long time after I had start , I found a very usefull web site : Katerina purple files.She have done the soft stay of Eleonora and many other things about italian renaissance .She had the same conclusion then me about the picture.It was good to see I wasn't so wrong.Her website is full of  info and I must admit seeing what someone else have done can help.

Fact about this item:
Fabric: linen for lining and cotton velvet for the outside
Embrodery: none
Type of stitches : pad stitches by hand , the rest entirely by machine
Pattern : made by myself
Time to complete:13h30

mercredi 10 juin 2015

Layer no 2 to be complete : a pair of embroided drawer


After the camicia , the second layer I did start but not finish is a pair of drawer.I did wish to make the drawer extraordinary with full of embroidery but time as played against me .I realize with what I want to do it will take at least 40h only for the embroidery part .I really like my design and prefer to make a basic thing for the challenge and complete the real thing later.

The following picture is found in the book Moda a Firenze , one of my other inspiration can be found in the book Pattern of fashion 4 by Janet Arnold.


Differents designs I draw on a piece of linen to get an idea of what the design can looks like.It was hard to choose , many were interesting.


My final choice in progress


Here is a picture of the progress
For the shape of the piece , the pattern itself , I look in Pattern of fashion 4.The pieces are easy to do but I must admit my biggest issue was this triangular piece you see at right.Black and white picture doesn't help to see clearly.I know I know.This may sound really silly to many of you but I never done drawers before.
After a try , I realize where it should go.The triangular piece goes between the leg.Surprise.I personally found it gave more freedom of movement but even without it , it's ok.

A look on what other costumer have done bring this conclusion: most women don't make the triangular piece.You can argue it's more appropriate for men but still example in museum have it.I also assume it is more comfortable when you do horse riding but women probably do horse riding in amazon style.Anyway , to respect authenticity as much as possible , I made the triangle piece.
To close the drawer , I decided to make a matching button using the same silk.For the technical of covering a wooden button , I saw it in the book The Tudors tailors by Jane Malcom Davis ans Ninya Mikhaila.To make thing easier , I put bee wax on the silk.
The result is less shiny and a little less beautiful.As a first try I think it's good anyway.I think next time the wax will go in the middle of the button so it won't damage the silk .

Fact to know about the drawer:
Fabric: Linen from William Booth draper
Thread: blue silk
Embroidery: by hand
Time invest in it: 15h

mardi 9 juin 2015

The learn of new skills for the challenge

Learning to use a lucet to make cord.There is many good video on youtube to learn.I found it easier to watch the video then having a book with not enough picture.

My participation to the Italian renaissance  costuming challenge IRCC4 have not been a wast of time even if I had to leave before the end.I have learn so much during the process.I wish I could do it this year but with a new baby at home it wasn't possible.Maybe next year.
Making different type of braid.At first I wasn't sure if buying a dvd on the Tudor tailors shop about braiding was a good idea but it is , really.Braiding is much easier then I thought and the dvd is well done.
The making of tassel.Nothing complicated in that but you didn't know until you done it at least one time.
Embroidery.I never thought I would like that so much.I'm a really calm and patient person , embroidery fit my personality.During the coming month I will try to learn more.I will learn historical embroidery and modern.I will also try my hand at goldwork embroidery.The material is a bit expensive but I have many project in mind , some being for gift.
Learning to cover wood's button with silk , using a bee wax cake or not.It can create many beauty.
The stitches are probably too big but pad stitches were new to me and have been done by hand.
Button made from a basic square of fabric .It could be very usefull , not only for renaissance but also for middle age era.
This one take time but when I get it , I like it : elizabethan blanket stitches.This is a picture of many of my first attempt.
Patterning.I never done it before.Most of the time I use a commercial pattern and modify it.A first time I start from a drawing or picture in a book and draw it on fabric.

I did learn so much and touch an era I never try before.I love this kind of project , lot of research , lot of thing to learn but the result is incredible.You know where to start but never know where it will finish.

lundi 8 juin 2015

Acc no 1 complete: a mouchoir or handkerchief

Back in the renaissance , kleenex does not exist.Men around 50 years old in our modern time sometimes have mouchoir made of fabric in their pocket.My dad , grandfather and boss does have one.It is easy to believe they could have this fonction in the past or just  being  an elegant accessorie .

I found two examples in the book Moda a firenze  by Roberta Orsi Landi and Bruna Niccoli.One having a red embroded design , the other having tassels.I decided to make a mix of those.I choose a classic , easy design of leaf and stem.At the end it doesn't give the result I expect.It looks like more regency for me but it was done entirely by end.
I use a delicate white linen and silk floss.This is a close up of the stem and the leaf.I had never done embroidery before so for a first time I think it looks like nice.All the leaf does look good as this one.
A close up of the border.I know it's hard to tell  specially white on white but I use elizabethan blanket stitches to make the entire border.It take a lot of time but bring a lot of satisfaction because I made this by hand and have not use any machine.
The final result.The tassel are made by hand too and are in silk.It wasn't iron which give an impression of not being straight on the side but it is.
Two moderns examples of mouchoirs.At left a mouchoir with a print design made in Switzerland and bring from someone I know.At right a gift from a co worker which bring it from her travel in Belgium.The lace part is handmade.

Fact about the mouchoir:
Type of fabric: linen from William Booth draper
Type of thread:silk buy from Sartor fabric
Model of mouchoir : found in the book Moda a Firenze by
Reference book : Elizabethan stitches by Jacqui Carey
Time to complete the item: 11h15
Type of construction: entirely by hand

dimanche 7 juin 2015

Jewelry and details for the dress


As I write before , Eleonora Di Toledo was a major inspiration.I must admit the jewel she wore are somehow classic to my eyes and I love that.That's probably because I love pearls , timeless and classic.

 Eleonora Di Toledo by Agnolo Bronzino 1543,picture from Web gallery of art

My first inspiration , I think this portrait is a source of inspiration of so many of us.I did focus on the hair net and the partlet.


My choice of material for the partlet: genuine button pearl and silk organza.When you look carefully at the picture ,the net and the partlet can looks like made with some kind of soutache.I did buy a dvd on the etsy store of the Tudor tailor.After some practice I can say it's close.Making such an amount of soutache would take a lot of time but a delicate one hand made would be beautiful.


 Eleonora and her son Giovanni by Agnolo Bronzino 1544-45 , Web gallery of art

Another portrait with similar partlet and hair net.On this one she wore more pearls.The buttons on the sleeves are beautiful.I know some people have make replica and cast their own.This is the kind of knowledge I do not have.

I do have extra long hair .A black hair net cost only 5$ on the web.Most of the time they are small or too small for all my hair and so tight around my head that I get headhache.

I use a piece of cardboard and draft a pattern .There is two colors of line as you can see , the first pink being a bit too small.The space between the line is quite important because a have an exact amount of pearls for it and do not want to buy more of it.

Buttons for the sleeves buy on Etsy .I use a gold paint to give them a more rich look.You can see the difference before and after.It required many buttons for the sleeves and it wasn't easy to find something beautiful for a reasonable price.You could be quite surprise and chock to see how much some button could be expensive.
A brooch and necklace from Sapphire and Sage , birthday gift from last year by my friend Gwenyver.As I do not want to tell Gwenyver the color of my dress and not telling much detail  about it , I haven't leave competition at that moment,she choose to offer me jewelry that could possibly match with my dress.She buy this not knowing I have order something from Sapphire and Sage.A real coincidence that we buy from the same place.

samedi 6 juin 2015

Accessories to be complete : a fan

 A few sketch of the possible handle.It was on my wall with all my planning of the project.

To fight the heat , nothing can replace a fan.The book :Queen Elizabeth's wardrobe unlock'd by Janet Arnold offer many possibility of model.I did have the book for a long time now and know it will be a good resource one day.The handle can have so many form.The more typical italian fan  is the flag fan but I must admit I didn't like it much.


I thought making my own fan from the base : feather and wood.I choose ostrich feather buy from ebay , they look really nice and can be dye if needed.

For the handle , which is not start , I thought I could make mine using my knowledge of woodcarving.After all , I have all the tool required for this.If something doesn't work , I have other piece of wood I could use and having an experimented and talended grandfather who does woodcarving is also a must.He could answer possible question I could have.I must admit I do not know exactly  how I will put the feathers in the wood but this little detail can be seen later.

vendredi 5 juin 2015

Accessories to be complete : a girdle

 Pictures from the Scala  museum

No dress is complete without jewelry.For the challenge , I thought I could do a girdle.This portrait , Isabella De Medicis by Allessandro Allori catch my attention.A girdle  should not be too difficult to do and will help to give an impression of luxury.


A close up of the girdle I'm looking for.The idea was not to make a replica but something inspire by it.The girdle of  Isabella is made of pearls , gold jewel with a stone in the center and the end is attach to a zibelline.
I buy ouch and a central piece from Sapphire and Sage.I choose black stone to pop and I thought it could match to many potential color of dress I could make.

The pearl are genuine.The have the button shape for a lower cost but will work perfectly for a girdle.The size is between 8-10mm.If I had buy smaller pearl it would not have been the same and would not have fit with the dimension  of the ouch or the central piece.

It would not be possible to find a zibelline in my province and it can't cross the border if I found one.The best I can do is to get a close cousin of it  but I won't.I don't like those little beast with jewelry for their eyes , it's creepy for me.

Right now the girdle isn't done.It would be easy to make it and not much time consuming.I thought it would be best to wait until the dress in entirely finish to make sure it is long enough specially around the waist.

mardi 2 juin 2015

Acessories to be complete : the shoes

Everyone knows how much important shoes are to complete an outfit.Buying a pair to match with my dress would have been extremely expensive and with two kids I can't afford it.Anyway , for the challenge I add to make it not buying a pair.

Slippers made of silk were popular and my inspiration have many pair of it.To make mine I start with a pair of random slipper from WalMart at 10$.It was important to find a pair made of soft fabric as I intend to sew over it.


My way to done thing.I used cheap lining to draft the shape of the shoe having in mind I will sew the futur silk fabric over it.I shape the top and two sides.There will be a seam on the back and those on the side will be hide by the top.I also plan to make something embroided on the top.They are not done yet because I will use all the leftover silk from the lavender under dress.It's not 100% historically accurate but it will have the look and are made at a very low cost.

lundi 1 juin 2015

Camicia part 2/2

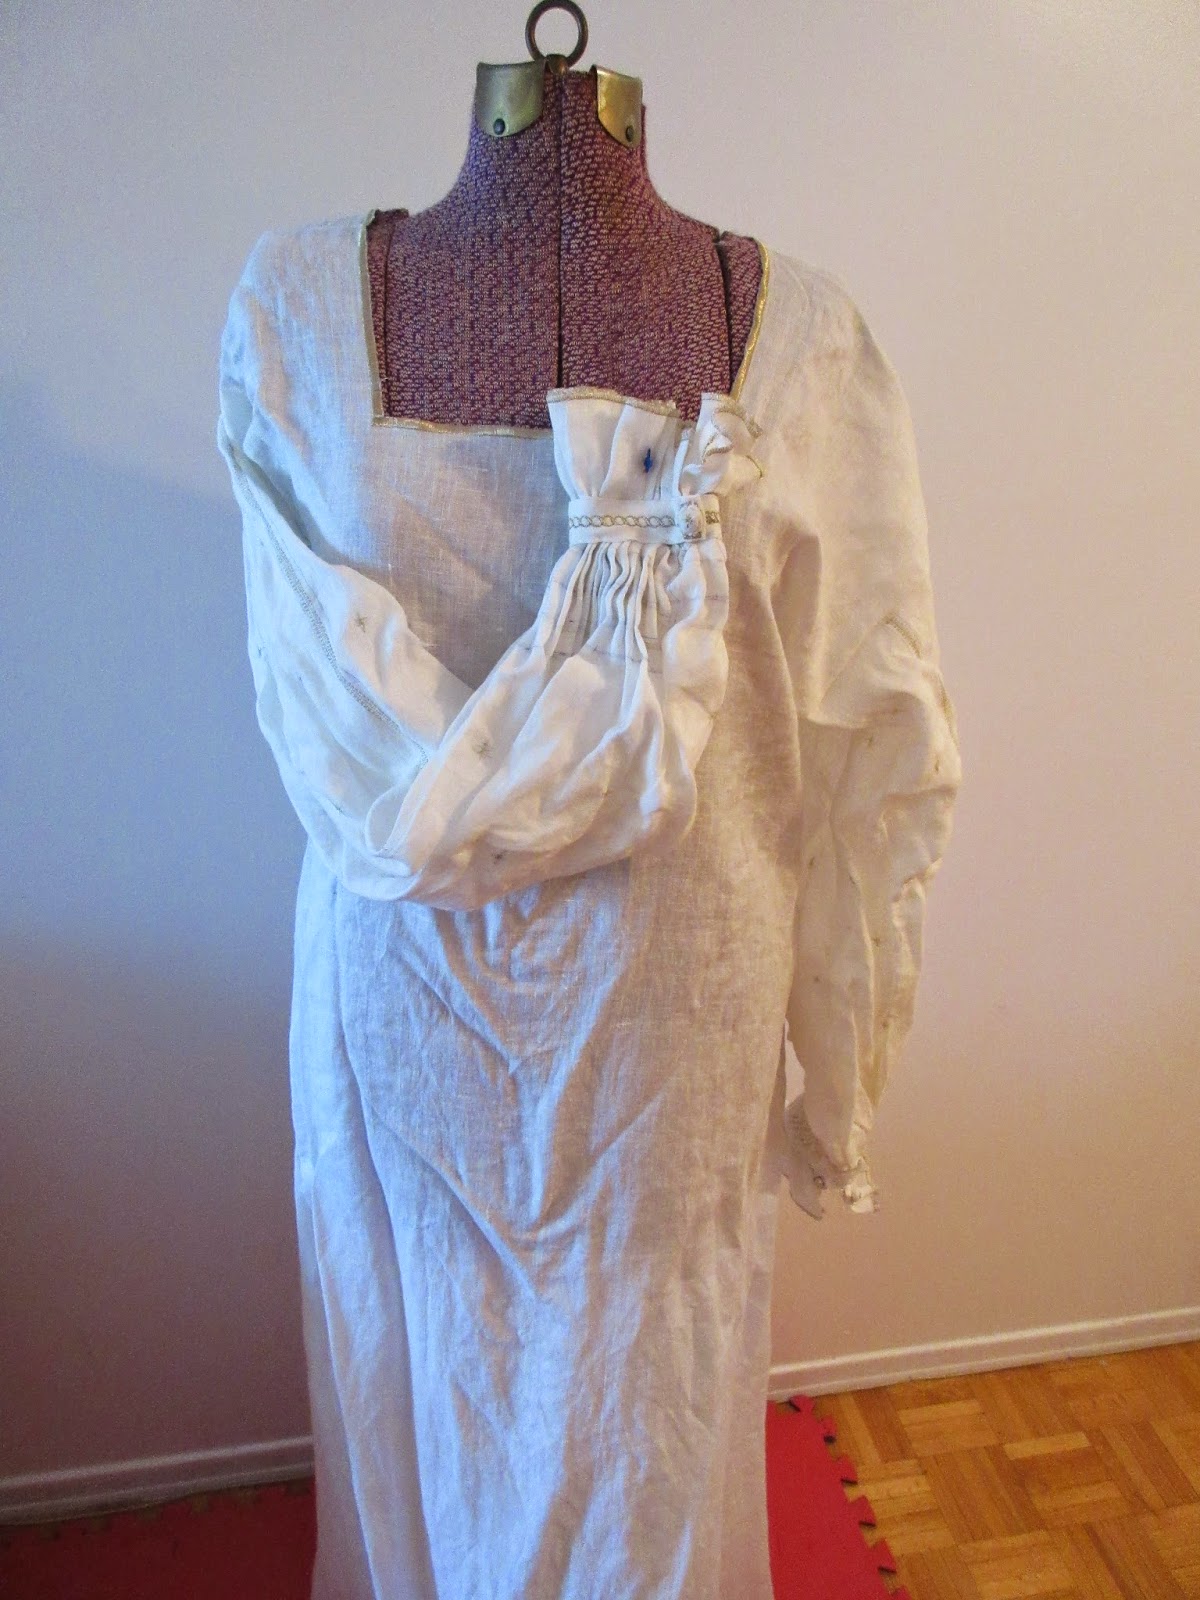
The final result on the dummy.I love it but I'm not sure if the neckline is too low.When I will finish the overdress I will know it for sure .It's not on the top of my to do list but it's still in the list.
Details of the sleeves.I made 43 stars by hand on each .The gold line,not really a straight line, have been done by machine.Each sleeve have three of them .I think it add a little touch which is great and looks like more elaborate.
No garment in the world looks better on a living model.It gave an exact idea of what it really looks.By the time the camicia have been finish and for me to realize and decided to take the picture,I already have a big belly as you can see it.Too bad that my honey wasn't there to take the picture.

vendredi 24 octobre 2014

My camicia , part 1/2

Finally I can start presenting the camicia I done for the challenge.By the way , camicia is the italian word for chemise.When I start uploading the pictures I realize that some of them have not been taken .That's why the post will be in two parts but I have so much to tell about this .

You should first know it was the first time I ever made an 80% historically correct chemise.Since I use the sewing machine for some part I can't pretend it's 100% period but still look perfect , at least for me.Before the challenge I never did embroidery of any kind.With lot of determination , I get good result and I am proud of it.Before talking of the first 10 pictures , here are some facts about this:

Hours to complete: 20 hours
Type of fabric: 4 oz linen from William Booth draper
Amount of fabric used:  around 4- 4.5 m
Embroidery : by hand and by machine
Buttons: made by hand
Pleating at the wrist: made by hand
Pattern: custom made from the Elizabethan smock pattern generator , 99% correct
Satisfaction with the result : 100%


This is the detail of the neckline.It has a square shape you can't entirely see.I wish to have a little gold so I made this by machine.The linen being delicate, I made a test before, I had to use tear away lining under the fabric .My machine refuse to do it without it.I remove the excess when it was done.

The hem at the bottom of the chemise.I put a lot of gold accent everywhere so I thought why not for the hem.I use a bigger thread and do it by hand.To make as much as possible regular size point , I take my time and it take 1h30min to complete.

My first try of mock up ,don't do it when your tired or not focus.For the pattern , I did use the Elizabethan smock pattern generator.Except for the size of the underarm gusset , which I did half the size , it was perfectly correct.

The reason I use the generator is from comment I did have read in the past , people were saying making a first chemise can be tricky and required lot of attempt to make something you will be satisfy with.For a reason of time , I thought it would be wise to use the generator as a base and will have a minimum of correction to do.I found the underarm gusset too big for my taste .That's why I do it half the size and it was quite enough.

Except for the side piece I cut too short and didn't place properly at the first try for the mock up, the construction was really easy to do.The chemise is longer of what you see on the picture , my personal choice.


For the decoration on the sleeve , it take me a lot of time to choose.Looking in my embroidery book to see what I can do , I finally find a model of start .As I say , the linen is delicate.To make the stars I use bead embroidery needle size 12 .

Even if it's a very thin needle , it make hole when it enter in the fabric.I was told it was normal but can be reduce if I iron it.I had not the chance to try it yet.The stars are made by hand for a total of 86 , 43 on each sleeve.

The beginning of my first button.I use the technique propose in the book The tudor tailor.
The finish thing.I make 2 of them , 1 for each sleeve.I also make a star on each and as you can tell from the picture , it was made by hand.


For the wrist , I wasn't sure how to do smoking .I simply thought as long as I could get pleat and fix properly , it should be find. I draw 5 lines on the fabric and did marks at very 1 inches to be sure to make things regular.At the end , it gave beautiful and perfect pleat.

The hem of the sleeve.Made by the overlock machine with a gold thread.
The wrist band.The band was first iron and then sew by hand . The design is made by machine and the button fix by hand.

The other side of the band.I made the buttonhole by hand but must admit isn't as much as perfect I would like but still ok with it.The picture was taken before I open it.